
A worn or bent wiper linkage is one of the most common reasons wipers stick, knock, or stop mid-stroke. The good news: replacing a wiper linkage (also called a wiper linkage assembly or wiper transmission) is a straightforward job that most DIYers can finish in under an hour with basic hand tools. This guide walks you through the whole process step by step, from removing the cowl to testing the new assembly.
Before you start: make sure the linkage is the problem
Slow or jerky wipers can also come from a weak motor, a loose nut at the arm, or worn blades. If you are not sure yet, read our guide on diagnosing windshield wiper linkage issues first – it covers the typical symptoms (knocking noises, one arm moving while the other stays, arms stopping mid-sweep) and how to tell them apart.
Tools and parts you will need
- Replacement wiper linkage assembly (matched to your make, model and year)
- Socket set and wrench set
- Screwdriver set and trim-removal tool or pry bar
- Needle-nose pliers
- Masking tape and a marker (to record the arm position)
- Silicone-based lubricant
- Safety goggles and gloves
Tip: match the new linkage by OE part number whenever possible. Our windshield wiper linkage catalog cross-references every assembly to its original part number, so you can order by the number printed on your old linkage.
How to replace a wiper linkage, step by step
Step 1: Disconnect the battery and gather your tools
Disconnect the negative terminal of the battery first. Wiper motors can park themselves unexpectedly and cycle when least expected, and you do not want the linkage moving while your hands are near it. Lay out the tools from the list above and keep the fasteners organized as you remove them.
Step 2: Remove the cowl to access the linkage
The linkage sits under the plastic cowl at the base of the windshield. Remove the screws or push clips securing the cowl (some are hidden under the hood seal or the wiper arm covers), then lift the cowl gently with a trim tool. Mark the position of each clip so reassembly is easy.
Step 3: Mark and remove the wiper arms
Lift each wiper arm away from the glass and unbolt it from its output shaft. Before removing, mark the shaft and the arm hub with masking tape – this reference makes it much easier to reinstall the arms in exactly the same park position, so they do not sweep too low or hit the cowl later.
Step 4: Disconnect the old linkage
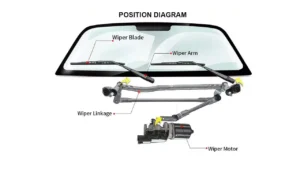
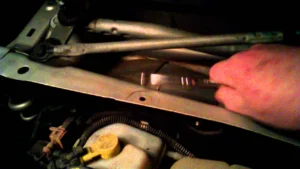
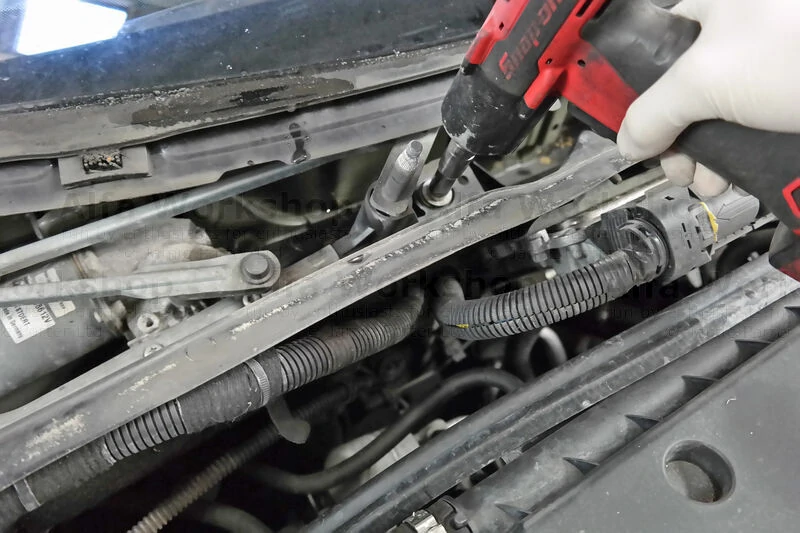
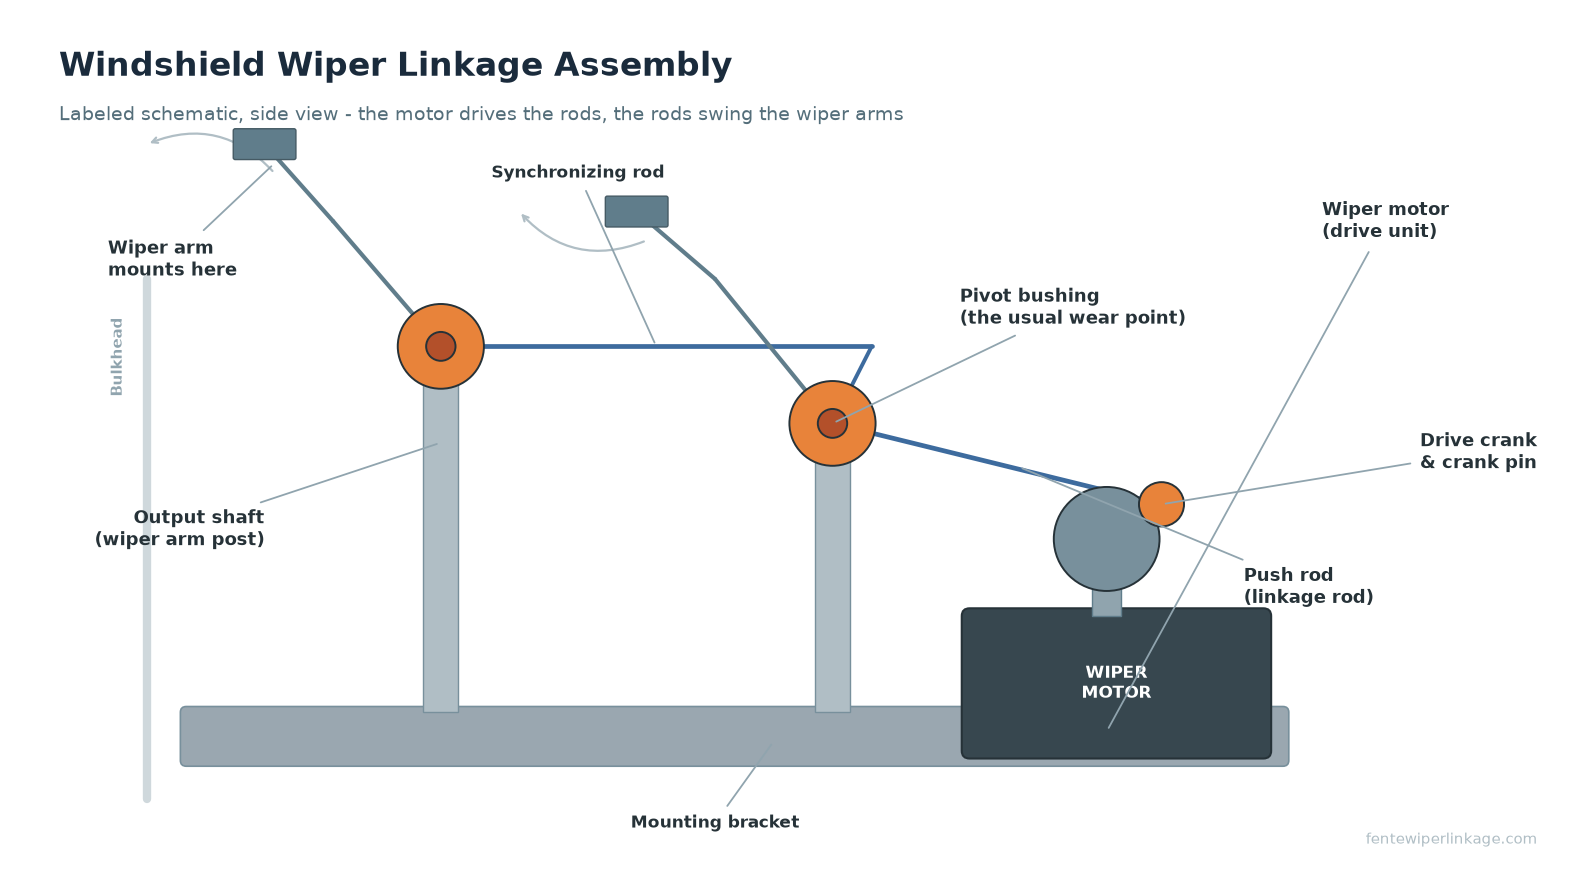
Locate the linkage assembly between the motor and the pivots. Unbolt the drive crank from the motor shaft first, then detach the pivot nuts and any mounting bolts or clips holding the linkage to the body. Note how each rod and joint is oriented – a phone photo from two angles saves a lot of guesswork later.
Step 5: Remove the old assembly
Work the old linkage out of the cowl area. It is a light part, but the arms and rods are awkward shapes – tilt and rotate it until it clears. While it is out, clean the area, check the motor shaft for play, and lubricate the pivot areas lightly with silicone spray.
Step 6: Install the new linkage
Position the new linkage the same way the old one sat, then tighten the pivot nuts and the drive crank bolt to a snug torque – do not overtighten the plastic or aluminum joints. Reconnect anything you unplugged, and confirm every joint moves freely by hand before you go further.
Step 7: Test, then reassemble
Reconnect the battery, run the wipers through a full cycle on intermittent and high speed, and watch for smooth, synchronized sweeps. If one arm lags or over-swings, pull the arm off and re-seat it using your tape marks. Once the sweep is correct, refit the cowl, the arm nut covers, and you are done.
Frequently asked questions
How much does it cost to replace a wiper linkage?
For a common passenger car, an aftermarket wiper linkage assembly typically costs between $30 and $120, and a shop will usually add 30 to 60 minutes of labor. Doing the job yourself with a matched assembly keeps the total well under $150 in most cases. Our wiper linkage replacement cost guide breaks the three options down in detail.
Is a wiper linkage the same as a wiper transmission?
Yes – in US repair manuals the terms are used interchangeably. Both refer to the rod-and-pivot assembly that converts the motor’s rotation into the sweep of the wiper arms. Parts catalogs may list it as “linkage assembly”, “transmission linkage” or “wiper motor linkage”.
Can I drive with a broken wiper linkage?
You should not. In most states, functioning windshield wipers are a legal requirement, and losing your wipers in rain or snow ends a trip immediately. A linkage that knocks or skips today will usually fail completely in wet weather – replace it while it is still a driveway job.
How long does the replacement take?
On most cars, 30 to 60 minutes. Vehicles with a deep cowl or a rain-sensing sensor module in the way can take a little longer, but the procedure is the same.
Should I replace the whole linkage or just the bushing?
Individual bushings exist, but on most modern vehicles the linkage is sold as a complete assembly – and a complete replacement restores the factory geometry in one go. If one bushing is worn, its neighbors have usually seen the same miles, which is why we supply complete assemblies cross-referenced to the original OE number.
Safety notes and the mistakes that cost the most time
- Never run the wipers with the arms removed and the linkage exposed. The rods move fast and can pinch fingers; keep the battery disconnected until the assembly is bolted down.
- Do not force a frozen wiper arm. Freeing ice by hand with the arm under load is the most common way a rod gets bent, which turns a linkage swap into a linkage purchase.
- Mark the arm position before you pull it. Two strips of masking tape take ten seconds and save the whole job from a re-fit that cannot be re-fitted without guessing.
- Do not overtighten the pivot nuts or the crank bolt. The joints are plastic or aluminium; snug is enough. Overtightening distorts the bushing and the sweep goes stiff.
- Re-seat the arms with the linkage parked, not mid-stroke. Cycle the wipers once to let the linkage find its park position before the arms go back on.
Where to get the replacement part
The quickest route is to match the OE number stamped on your old linkage rather than the model name alone. Popular fitments include the wiper linkage for the Toyota Hiace 1992-2004 (85160-95J03), the Toyota Vios 2002-2013 linkage (85150-0D040) and the Honda Civic 2006-2007 linkage (76530-SNA-A02). Our windshield wiper linkage catalog lists every assembly with its original part number.
Wrapping up
Replacing a wiper linkage is mostly careful disassembly: battery off, arms marked, old linkage out, new one torqued in, and a test sweep before the cowl goes back. If you need a replacement assembly, browse our windshield wiper linkage catalog or our full wiper linkage replacement guide for fitment by OE number, make, model and year.